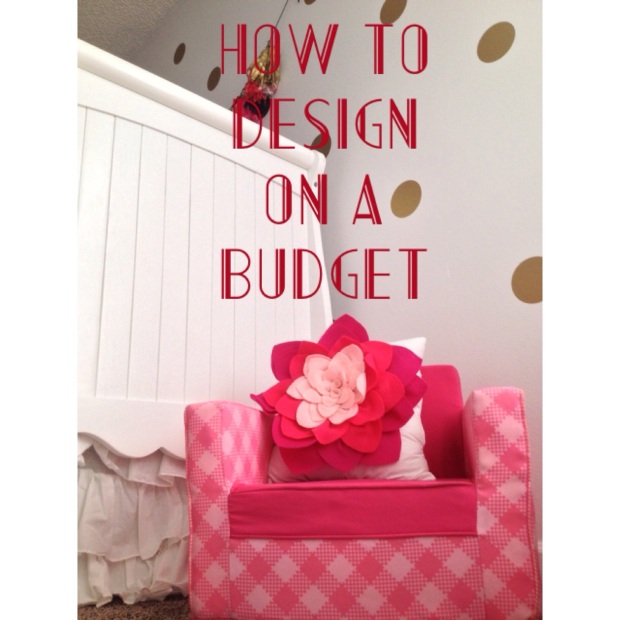
I could list a hundred reasons why interior design is important, starting with all the intricate facets, thoughtful details, each giving a glimpse of beauty and relief and joy. But today I am going to focus on one of the most practical aspects of interior design: BUDGET.
One of the biggest obstacles in interior design is budget (or lack there of). Many people think having a well designed space can ONLY come with an expensive price tag. But I’m here to tell you that the exact opposite is true! In fact, if you have a cohesive design plan (as opposed to buying pieces one at a time whenever you feel some extra change burning a hole in your pocket) you will actually spend LESS money and have Much MUCH more to show for it!

My process of design includes the following steps which I will explain in detail.
1. Comprehensive Design Plan and Concept
2. Potential High End cost
3. Color coordination
4. Budget Hunting (over time) and projects
5. Happy, comfortable and justified in saving on some items and then splurging on others.
6. Finished, Beautiful, Cohesive Interior
comprehensive Design Plan:
Lots of people think picking a wall color is all that needs to be considered in designing a room (let’s say a nursery as an example). So, they pick a color, Pink, and before baby comes buy baby items, register for things, and when they get everything together it is ALL Pink! And now baby comes home to an overwhelming amount of pink. And many, many different shades of pink to boot.
Let me emphasize, color is not bad! And pink is not bad either. But “Pink” is not a comprehensive design. “Pink” is simply a color, and color is only 1 aspect of a multi-faceted approach to design.
In creating a design plan, GO BIG! I mean it! Find the best of the best to achieve a desired look no matter what the cost of each item. It does not matter how you attempt to piece things together for your design plan. Draw a scaled floor plan, or if you feel unequipped you can glue and paste magazine pictures into a collage or make a Pinterest board. But the idea is the same, design your room with each desired piece of furniture, each curtain, every shelf, picture frame and pillow case. Don’t just pick wall colors, but decide what wall will be painted and in what color, pattern, mural, etc. in creating a design plan consider all of the following aspects:
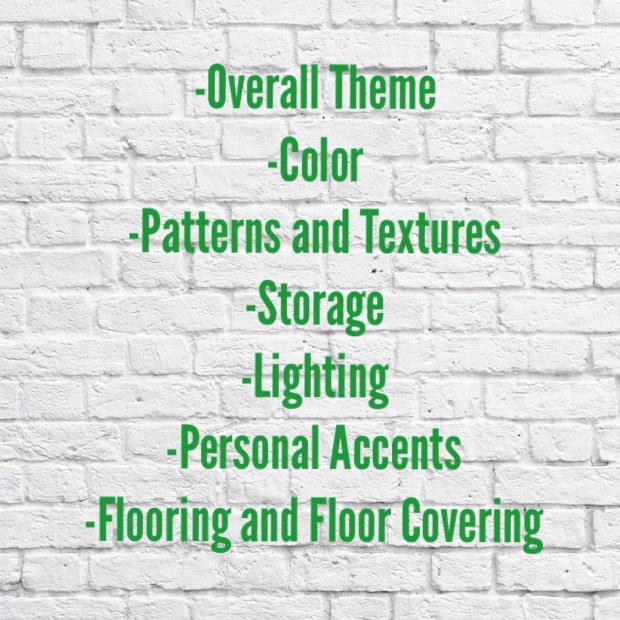
-Overall Theme
-Color
-Patterns (fabrics for curtains, pillows, bedding, wallpaper, etc)
-Storage
-Lighting
-Personal Accents
-Flooring (wood, carpet, tile, rugs) use what you have, change it, or add to it.
Potential High End Cost
Now that you have dreamed up your dream space, calculate what the cost would be to achieve it based on the actual items you picked out. And don’t forget to BREATHE when you see the $5000 price tag!
Knowing the high end cost actually helps you find the best places to save money, as well as the things you are comfortable splurging on. This leads straight into the next step.
Budget Hunting and Projects
Now that you have your room designed in your mind and on paper, the fun really begins. One of my favorite things is looking at furniture posts on craigslist and offerUp. Sometimes the exact item you are looking for (say an ikea cubed book shelf) is being sold for half the store price, just down the block! One of my very bet finds was the exact $300 Zgallerie coffee table that I had my eye on, from a consignment shop for only $79!
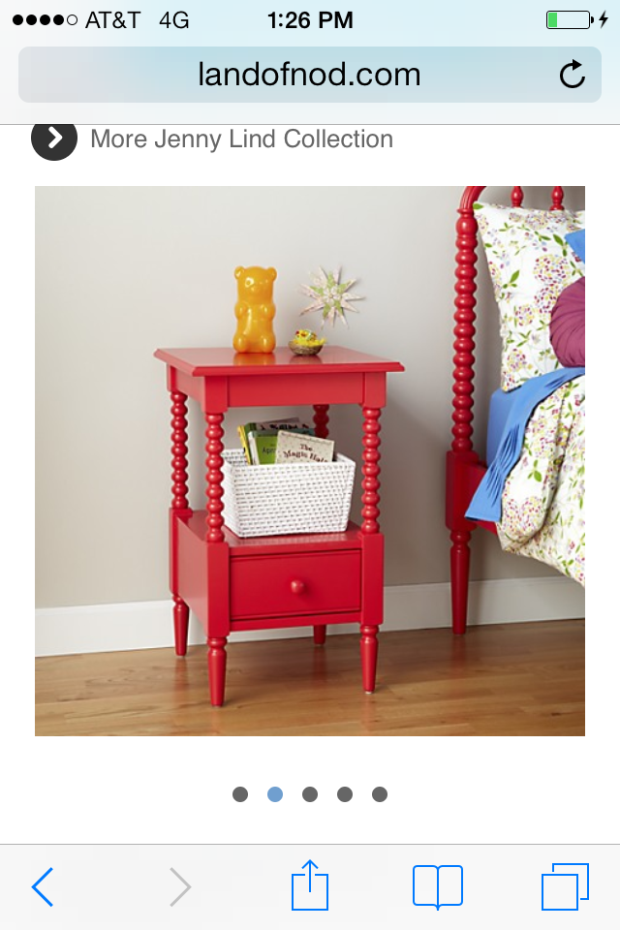
Similarly, the $299 Land of Nod bedside table you have picked out, will start to look oddly similar to the $69 Target side table you see on you weekly target trip.
And sometimes, you will spot a piece of furniture sitting on the curb with a “Free” sign taped to it, and you think to yourself, “hmmm… A little Kelly green paint and I think I’ve found my $500 Anthropolgie bench!”
Not to mention, there are a plethora of great online discount furniture and design stores to help you save on big ticket items. Home decorators collection and Overstock.com are my favorites! And always check the sale section if your favorite designer stores like West Elm and Zgallerie BEFORE checking the full priced section!
My point is this: when you know what you are TRULY looking for, the pieces that you’re after, you will be shocked how easily they appear to you and with a lesser price tag!
As for the projects. Once you do one DIY, you will be hooked and feeling able to tackle bigger and bigger projects. Upholstering the seat of a dining chair may soon turn into making your own upholstered ottoman.
On a personal note, having a design plan has always helped me justify my purchases to my husband. There have been “a few” occasions where he has said, ” Since WHEN, did you decide you needed (enter item here) 2 floor lamps…?” And I am legitimately able to pull up my design plan and show him that I have actually been on the lookout for floor lamps, and the ones I originally wanted were 3x the cost!!
Saving then Splurging
Once you have started budget hunting and realizing how much money you have saved, you can feel comfortable and confident buying the items for your space that were a part of the original design and that you want to remain a part of the design and even become the focal point of your design. A $1200 couch seems much more affordable when you bought 2 side chairs at consignment instead of $600 a piece. Plus, some big purchases are in fact an investment- when it is something you want to have for a long time, high quality goes a long way.
You may also decide to “mini-splurge” by buying a $40 designer throw pillow that adds the perfect accent! And let’s face it; sometimes the thrifty light fixture just doesn’t measure up to the designer one you want, and it probably never will no matter how much you could potentially save… So splurge!
Finished Space
I have seen a lot of beautiful spaces that were designed on a budget. And I have seen many many spaces designed without a design plan at all. The “no plan” spaces end up discombobulated and spending money on items that go on to be replaced in a year because they never fit right to begin with.
But as sure as I am that the sun will rise in the morning, I am sure that having a design plan WILL save you money, and WILL give you the beautiful space of your dreams.
Putting Plans into Action
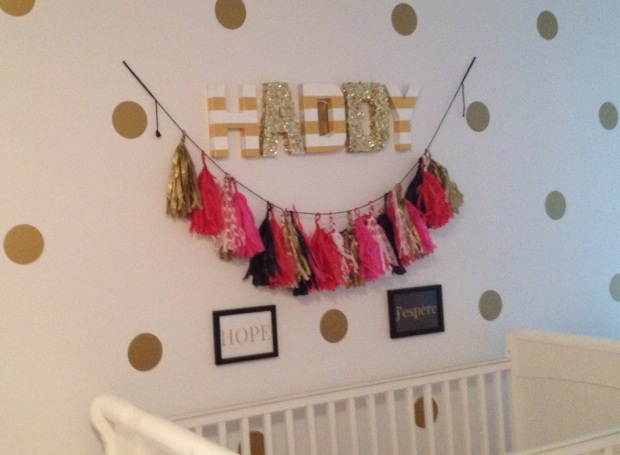
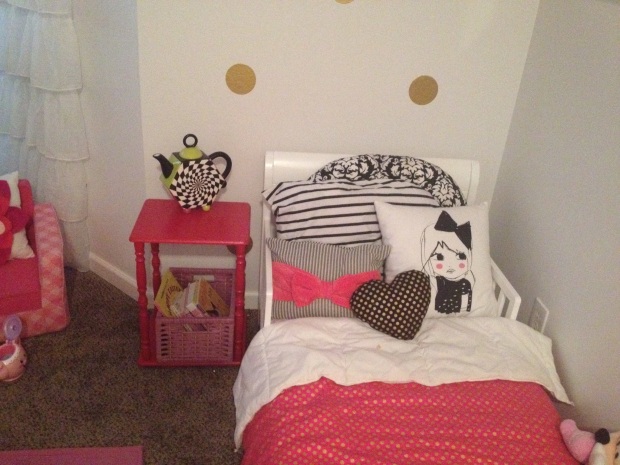
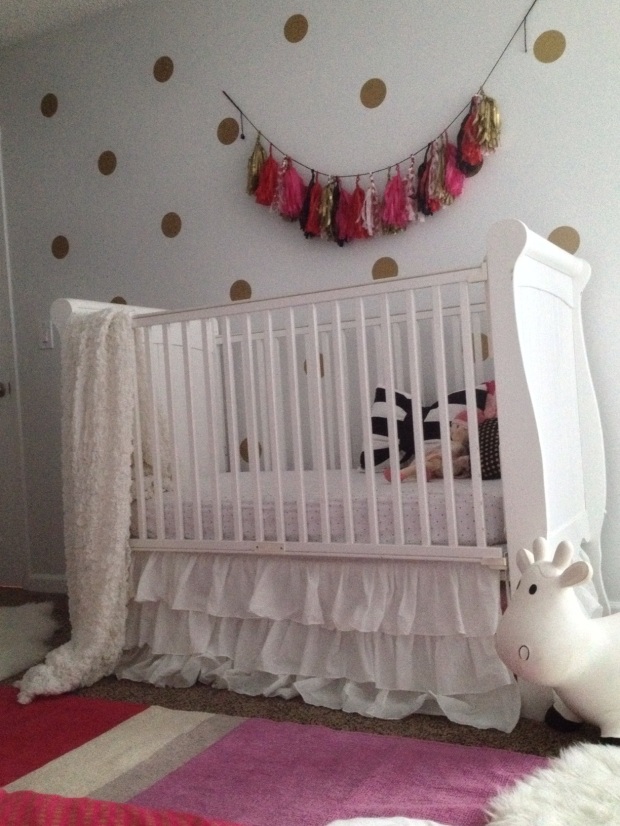
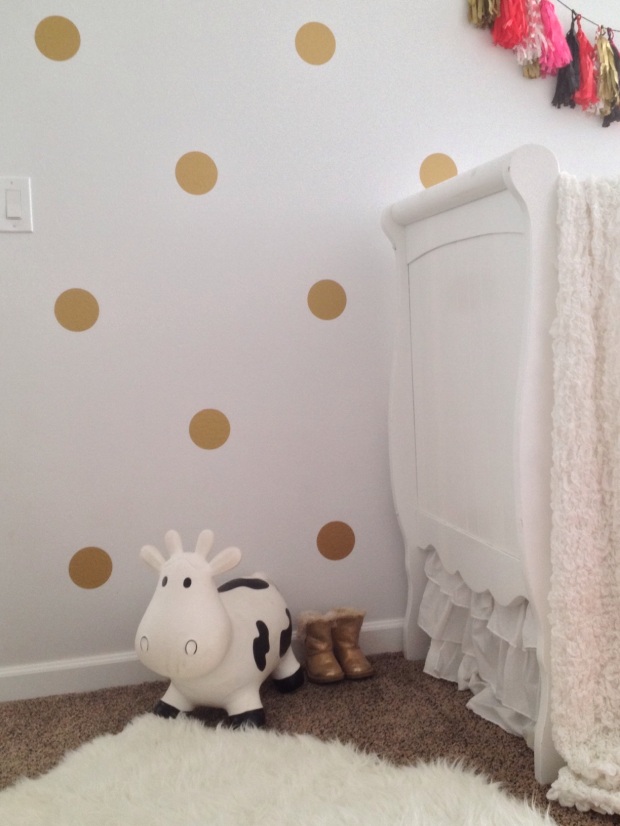
I have so many examples of designing and saving money but I’m going to use my daughters’ nursery as an example. As you may remember my design plan from long ago check it out.
And here are the results:


Savings:
Toddler bed: given to us by a friend $0
Crib: craigslist $100.
Crib sheets: Target $10 each
Tissue garland: hand made $5
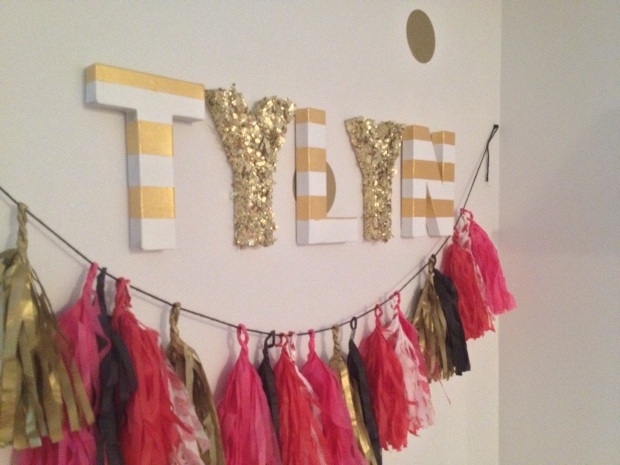
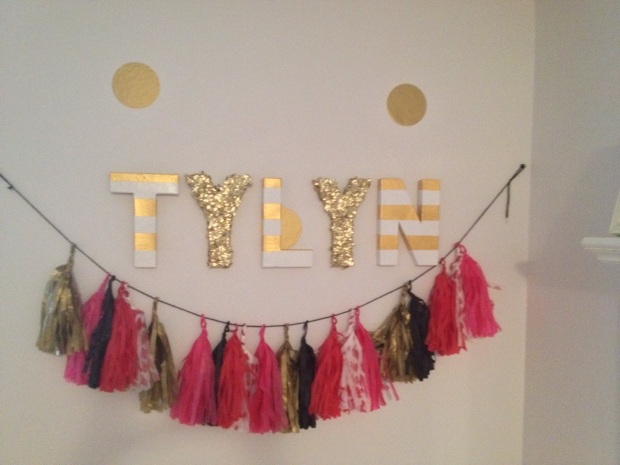
Name letters: hand made: $20 to spell Haddy and Tylyn
Antique Dresser: from my mom $0
Ikea shelves in closet $80
Ikea Color block rug $29
Ikea faux sheepskin $9
Duvet cover fabric $10
Pink Target chair $15
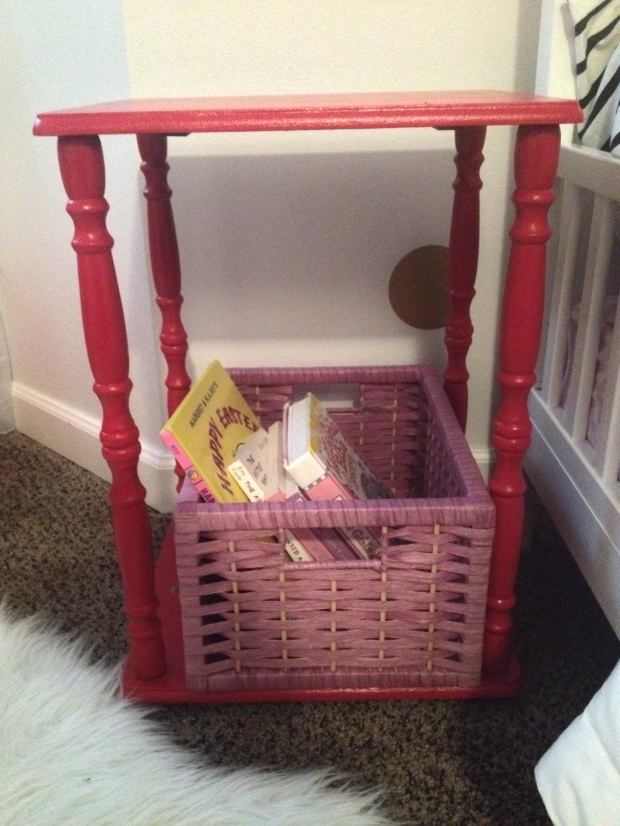
Side table: found in apt hallway for free. Inspired by this land of Nod $299 bedside table.
I bought some paint and a basket and have a $20 version of my own!
Splurges
All of my splurges are really just mini splurges.
Gold polka dots “urban wall” decals $30
Land of Nod throw pillows $40 total
Howdy Cow $40 (it’s decor and a toy!)